Create special colored ice cubes that fizz outside on the concrete for some fun in the sun! Here are step-by-step directions for the activity, including pictures and expanded questions to discuss with the children. This activity requires freeze time, so plan to provide other activities while waiting.
Please note: This activity is messy. Be sure the children are wearing clothing that can get dirty. Depending on the paint you use, clothing might stain.
- large bowl
- small bowls
- ice cube tray
- spoon
- measuring cups
- baking soda
- cornstarch
- water
- tempera paint
- vinegar
- squeeze bottles
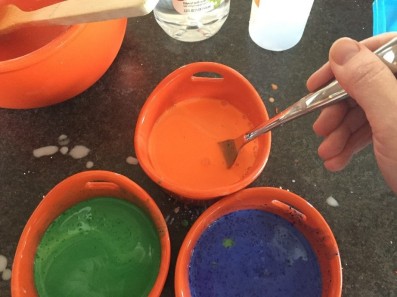
Step 1: Add ¼ cup baking soda and ¼ cup cornstarch to a large bowl. Add ½ cup water, and mix until all the powder has dissolved. (This will take a few minutes.)
Step 2: Pour the milky solution into separate smaller bowls. Squirt a bit of tempera paint into each bowl and stir until the desired color is achieved. (The paint will appear lumpy and separated at first. Keep stirring until the mixture is smooth.) Primary colors will work best to maximize the blending effect. (I only had these colors available for my sample.)
Please note: I first tried this activity using food coloring. I found the colors did not show up or blend as well on the cement. Powdered or liquid tempera paint works best.
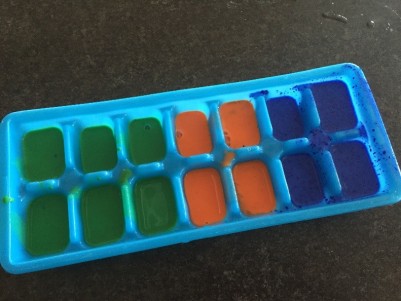
Step 3: Carefully pour the colored mixture into an ice cube tray, filling each section about ½- ¾ full. (Do not overfill or the mixture will run into the next section, as you can see with the blue paint below.) If you double this recipe, you will need more than one ice cube tray. Freeze several hours.
Step 4: Remove the tray from the freezer. Run a bit of warm water over the bottom of the tray to loosen the cubes. (You may notice a frosty appearance on the cubes as shown. This should not affect the outcome of the activity.) Place the cubes in a bowl to take outside. You might wish to allow the children to feel the cubes at this point. Ask, “How do the cubes feel? Are they smooth or bumpy?” Does any color rub off onto the children’s hands?
Before heading outside, fill some squeeze bottles with vinegar. The more vinegar you use, the more fizzing action you’ll see.
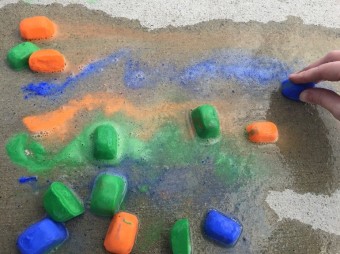
Step 5: Invite the children to place the cubes on a section of cement designated for this activity. If you have made several, consider stacking some of the cubes. If you used primary colors, place the cubes close to one another in order for colors to blend easily. The children may even wish to create a pattern as they line the cubes on the cement.
Step 6: Offer the vinegar-filled squeezed bottles to the children, and invite them to squirt the vinegar directly onto the colored cubes. What happens? Ask, “Why do you think the cubes fizz when you squeeze vinegar onto them?” As the vinegar interacts with the baking soda in the frozen cube, a reaction takes place, causing the cube to fizz. Give the children a few moments to watch the cubes fizz. Have them listen closely to see if they can hear a fizzing sound coming from the cubes.
Extension: Add some water to a squeeze bottle and have the children squirt the water onto the cubes. Do they fizz?
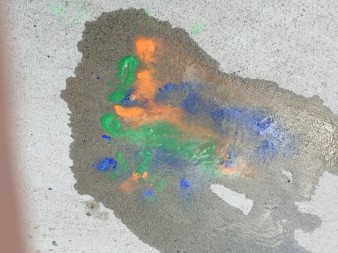
Step 7: Once the fizzing stops, the colors will begin to flow from the melting cubes. If it’s hot and sunny, the cubes will melt faster. Invite the children to rub the cubes against the wet ground to create more color. Talk about what happens when the colors run together. Do new colors form?
Extension: Wet the cement area with water, and invite the children to rub the cubes over the wet ground until they completely melt to create a rainbow of messy fun!


